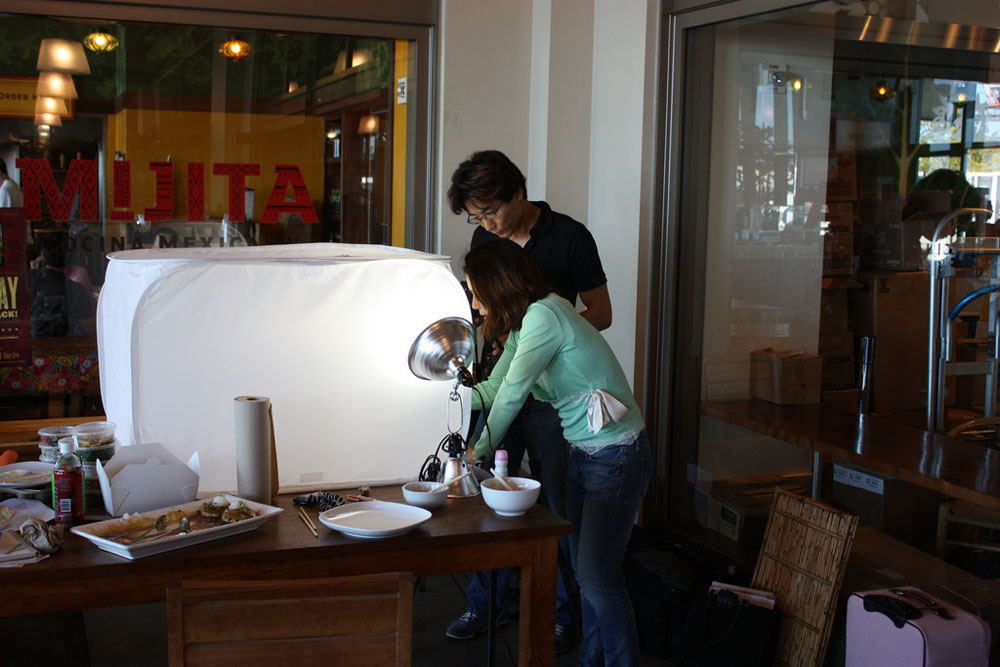
食べ物写真を撮る時の光の使い方に関する記事で目にした「diffuse」の意味とは?
先日、写真を撮る時の光の使い方について学ぶため、写真家主催のクラスを取ったんですが、その後まさに私がクラスで学んだ内容とかぶる記事を発見したので、読んでみました。すると “diffuse” という言葉が目につきました。
Scrimming/Diffusing: This will even out and soften light.
Take Food Photos Like Matt Armendariz (Meaning, Like a Pro) | Bon Appétit(2012年8月)
ポイント
“diffuse” は「拡散する」という意味です。
- to make heat, light, liquid etc spread through something, or to spread like this
- to spread ideas or information among a lot of people, or to spread like this
- to make a bad feeling or situation less strong or serious
(光や熱、液体だけでなく、考えや情報を人びとに “拡散” する場合にも使われるんですね。3. のようにマイナス感情や良くない状況を和らげるという意味でも使われるみたいです。アップルとサムスンの特許訴訟(patent dispute)に関する Forbes の今日の記事『Apple, Samsung Patent Battle Could Lead to Unusual Deal』では 3. の意味で “diffuse” が使われていました。)
「拡散:こうすることで光を外側に向けたり、やわらかくしたりすることができます」と書かれていたんですね!
補足
ということでこの記事は、食べ物の写真を撮る時の光に関する注意点についていろいろ書かれていたのですが、私が読んで気になった部分を以下3点だけピックアップしてみました。
- 適切な撮影場所を選ぶ(Choose the right location)
- 光をコントロールする(Control your light)
- 光がうまく当たっていない写真を撮る(Take poorly lit photos)
Almost like your Earth Sciences textbook from grade school (figure A, figure B), Armendariz’s book demonstrates the different results you can get from changing your light set-up. “Forget your fluorescent light in your kitchen,” says Armendariz. “You need to be able to move your light source where you need it.”
要は “撮りたい写真の雰囲気に合わせて光源を動かすという発想をせよ” ということですね。挿絵は光源が窓になっているので、昼間の撮影を想定していると思われます。窓の方にカメラを向けると逆光になって食べ物が暗く映る反面、窓を背にして撮ると食べ物がくっきり背景から浮き上がっているよう。窓が横にある写真は、ナチュラルな雰囲気が感じられます。
“People understand the need to add light to photos, but sometimes you have to do the exact opposite thing to make a photo work,” says Armendariz. Even for novice photographers, he suggests using a few simple tools to either add light or remove it from a photo:
Scrimming/Diffusing: This will even out and soften light. You can use paper, nylon, vellum, wax paper or even your household curtain to achieve this effect.
Reflecting/Bouncing: To fill and increase light. Use foil, white paper, mirrors, foamcore or reflectors.
Blocking/Removing: Decrease light and control those overexposed or “blown out” areas. Use cardboard, black foamcore, fabric, plastic needlepoint canvas and mesh screens.
これは私もクラスで学んでなるほどと思いました。光を足すだけじゃなく、意図的に拡散させたり、反射させたり、差し引いたりする必要もあるんですね。
同じ Bon Appétit の別記事『How to Take Perfect Food Photos』によると、とにかく食べ物を撮る時は光源が食べ物に直接当たって変にぎらぎらしないよう気をつけることが大事だそうで、天気が良い日は自然光あふれたテラス席、あるいは窓の近くの席に座るのが良いそう。夜でもランプのある席などを選び、ランプを壁の方に向けて光を拡散させること。フラッシュを使いたい場合は、光を拡散させるためにフラッシュの前でナプキンを持ってもらうなど誰かに協力してもらうと良いみたいです。食べ物の写真を綺麗に撮りたいと思ったら、席選びと人選びが重要なんですね・・・
Hear us out on this one. Armendariz’s book doesn’t just include gorgeous examples of food photography, but truly terrible ones as well. He says that experimenting with various light sources and their positions is the only way to really learn about photography. After all, you’re the photographer. Do what looks good.
要は、読んで納得、で終わらせるのではなく実際に自分でいろいろ試して練習せよ、ということですね!
ちなみに、私が受けたクラスは「人のポートレイト写真を撮る時の光の扱い方」について学ぶというものだったのですが、ほぼ似たような内容でした。実践的なクラスだったので、実際に自分で光源をいろいろ移動させて写真を比べたりしましたが、本当に光源の場所や光の足し引きで被写体の印象が全く異なるので面白かったです。人だと被写体の協力が必要ですけど、食べ物だったら家で自分で作った料理を撮ったりできますし、練習しやすそう。

(イメージ図 By Gary Soup [CC-BY-2.0], via Flickr)
私は今まで写真を撮る時、正直光のことは明るさくらいしか意識していませんでしたが、もっと光を効果的に扱えるように、さっそくジェガーさんにナプキン持ってもらったりしていろいろ練習してみたいと思います。
